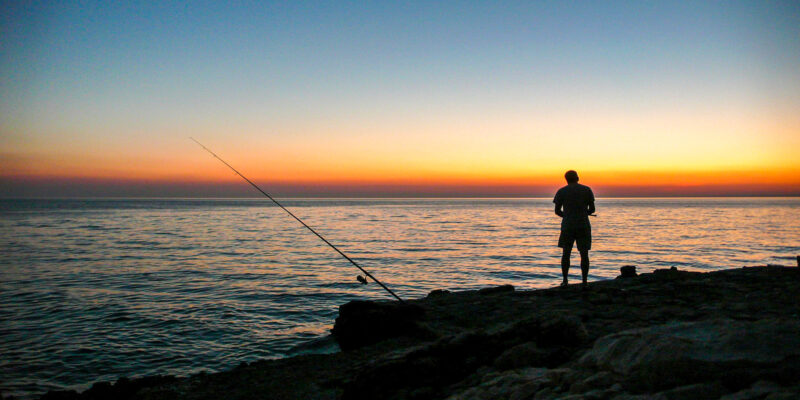
Have you ever wondered what Americans do with their leisure time? I certainly have. I always like to be in the know. For some reason, hobbies fascinate me. I’ve got friends who assemble remote control car kits, fly drones around to capture video, and even make hand crafted fishing flies. What prompts people to do things like this? How did they become interested in their hobbies in the first place? Why do they stick with them and continue doing what they do? I answer all these questions in this post. I also clue you in to America’s current favorite pastime. For better or worse, it’s here and it’s likely to stay. But beyond all this, I let those of you who are interested know how to keep busy. If you’re looking for a hobby, I provide a list of the current favorites. After that, I give you some clues as to how to settle upon your own. So if you’ve got an itch to do something new with your free time, this is the post to read. Click on through. Continue reading…
The Connected Farm
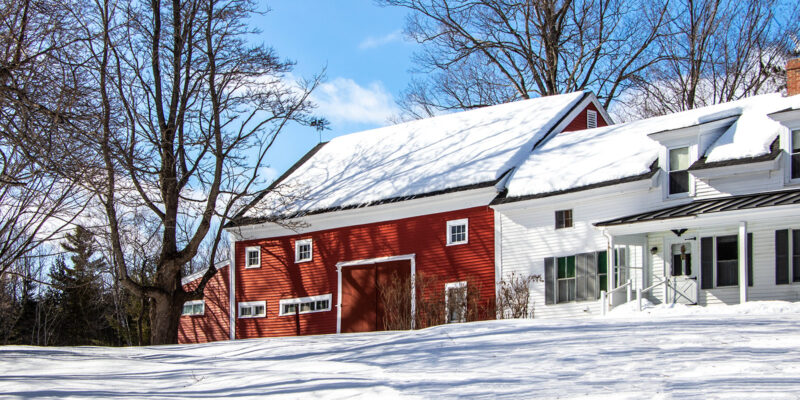
I was gifted a new (used) book this year for Valentine’s Day that I’m super excited to read. It covers the entire American Revolution, from the very first whispers of dissent all the way to the Treaty of Paris, which ended the war. The book is titled The American Revolution – First Person Accounts by the Men Who Shaped Our Nation, written by T.J. Stiles. In this post, I discuss the book and my reasons for wanting to read it. What’s more, I also discuss a specific type of New England home that was built before, during, and after the Revolution – the Connected Farm. If you’ve ever driven through the hills and valleys of Massachusetts, Vermont, New Hampshire, and Maine, you’ve surely seen this type of home. It’s long and winding and utterly beautiful. You’ll need to see the photos I’ve included inside. Toward the end of this post, I discuss a few interesting features of John Adams, our second U.S. President. What a hardworking, magnificent man. To start things off though, I offer an interesting story about my own history – one about my time working in radio. It’s a must read and one I hope you thoroughly enjoy. Continue reading…
The Aesthetics of Merrill Hall
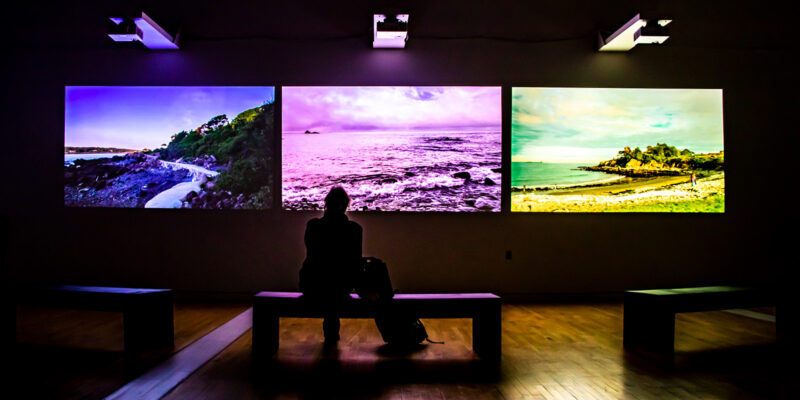
A post about many things beautiful. A library, an art exhibit, a college building, and then a discussion on the philosophical branch of aesthetics. Somehow, an ordinary day turned into an extraordinary one. Cameras are wonderful things. They encourage us to do what we wouldn’t normally do and go places we wouldn’t normally go. In the case of this day, we visited and photographed our local library, stopped by an art exhibit, and then explored the oldest building on the campus of the University of Maine at Farmington. And during the process, learned a few things; who built the library and what materials were used, who is Markeith Chavous, who is Lillian Nordica, and what any of the above has to do with aesthetics. If you think you’d be interested in the above or if you’d like to see lots of photos of the interiors of local buildings you may have driven by hundreds of times, please click through. I never thought I’d see what I saw and I have a hunch you might like to see it too. Continue reading…
Twice Sold Tales
A few weeks ago, Laura and I made a routine visit to Farmington, Maine, one of many of our home’s neighboring towns. We visit Farmington regularly for oftentimes the same reasons; to shop for odds and ends, to poke around a new store or two, or to visit the public library. Surprisingly, as routine as our trips are, they usually provide new experiences. On our most recent visit, we were gifted some stunning mountain views along with classic New England winter sidewalk excursions. Farmington rarely disappoints and if you hang around long enough, something is bound to happen. During this particular visit, after talking with a few friends, we stopped by Twice Sold Tales, a used book store. I have a new interest and I wanted to see if the store could help. Spoiler alert: it can. I tell you all about it in this post. I also recollect upon an old advertising campaign from the 1980s that has to do with reading. If you’re a reader, you’ll want to read this. If you’re not, you’ll still want to read this. To see what the heck I’m talking about, I highly encourage you to click through to…read my post. Continue reading…
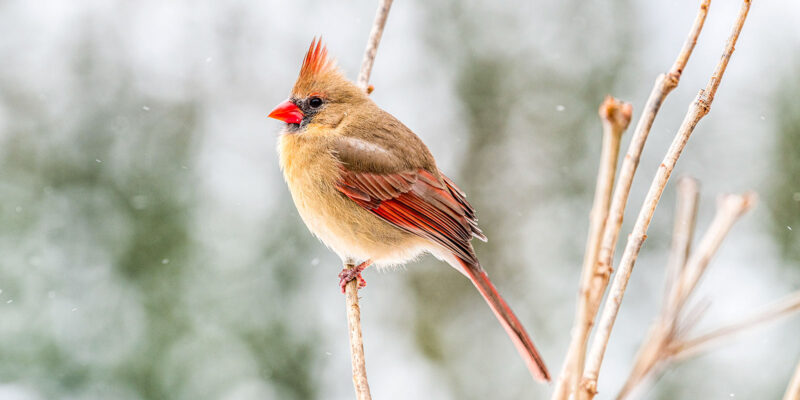
Beavers & Birds in the Back Yard
This is a simple post. It’s one about some beautiful winter birds landing at our back yard feeder. It’s also about hand feeding chickadees and hunting beavers. Not real hunting, just hunting to catch activity with our trail cams. Spoiler alert – we found the beaver and we’ve been recording what we think is a “him” for months now. He once had a fairly well made dam a few hundred yards upstream from where we first spotted him, but that dam has since washed away during two very strong, rainy winter storms. The dam stood no chance. The beaver remains though and he’s been spotted chewing down trees far away from home. I explain all this and much more in this post; it really is very exciting – there’s even a video! You’ll certainly need to click through to read the entire thing. Enjoy! Continue reading…
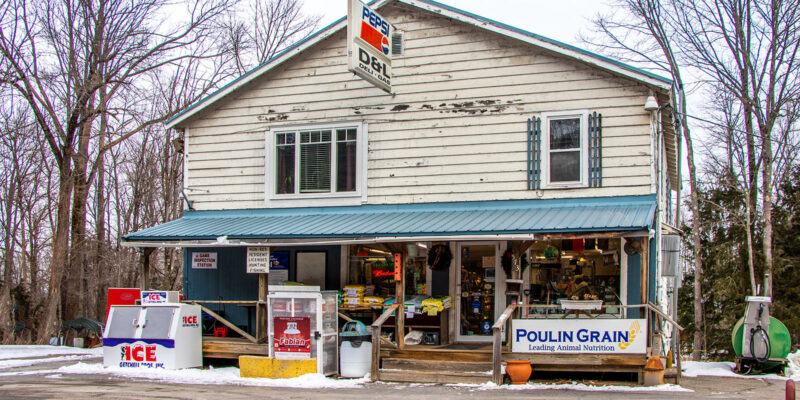
The Classic Maine Country Store
Country stores have been around Maine and the rest of New England for centuries. They were actually first seen during the colonial period, way back in the 1600s. Oftentimes created by traveling peddlers, country stores can still be found at the busier parts of rural areas. That’s because the peddlers of yesteryear were smart – they knew where people could effortlessly find them to purchase what they needed at the time. New England country stores are incredible places. They sell all sorts of things, from traveling necessities still in use through the ages to much more modern items like ice fishing sleds, produce, beans, nuts, and nails. The store we visited on this particular day even sold high quality wine. I suppose it’s adapted to the wants and needs of today’s patron. In this post, I discuss the country store Laura and I visited in December of 2023. I also discuss what we did after leaving the store – we made our way around North Pond and then to Mercer. We spent an exciting day exploring our little corner of Maine and it was a lot of fun. If you’re interested in reading about it and looking at lots of photos, I encourage you to click through to visit this post. Thanks! Continue reading…
Why Mainers Love the Winter
They’ll never admit it, but they all love it. In this post, I’ll tell you why. I’ll also share some thoughts on remarkable people. I actually discuss quite a bit in this post and I truly hope you click through to read it all. First, I’ll talk about how and why it is that Mainers are totally and completely in love with the winter, no matter what they tell you. After that, I’ll give you a peek into our new living room. Some used/new couches gave it just the makeover we were looking for. It’s super cozy now. Finally, I’ll delve into the topic of remarkability, or to put it more precisely, how to be remarkable.. It’s a big topic that needs to be addressed, if you’d like to take things to the next level, that is. Click through. I think you’ll enjoy what I’ve shared. Continue reading…

Object Lessons & Camden, Maine
I enjoyed writing this post a lot. It includes much that’s near and dear to my heart: a book about stories, a movie and its soundtrack, one of the most lovely towns on the Maine coast, and a thin slice of a typing lesson. What more can a guy ask for? To start, I’ll tell you that I’m currently reading a book called, Object Lessons: The Paris Review. I discuss it here. It’s an excellent book for those who love writing and short stories. It’d be perfect for those who are studying critical analysis as well as comparative literature. Or for those who simply like to read. After that, I discuss a Christmas movie called Last Christmas. Nearly the entire soundtrack includes George Michael songs, so if you’re a George Michael fan, it’s a must see. There’s a nice twist near the end. I also talk about our recent trip to Camden, Maine at Christmas and then I delve into the interesting world of typing. Do you leave one space or two after a period while you type? I know, I know, exciting stuff. I get into it in this post. Click on through to read more. Continue reading…
Christmas Caroling & Rockport, Maine
A long-time Christmas tradition seems to be falling by the wayside in many parts of the world. It’s a shame, really. Many of us love Christmas and the traditions that come along with it. If that’s true, why don’t more of us participate in those traditions? I ask this question in this post and I attempt to answer it as well. And after I tend to this rather serious discussion, I tend to an amusing story that you’ll be sure to love. I loved writing it and I’m hopeful it’ll strike the right chord with you while reading. After that, I discuss a recent trip to Rockport, Maine, one of the most beautiful seaside towns in America. I show off a few photos and share about our adventure there. Finally, I give you a glimpse into the latest winter wonderland this side of Maine has to offer. Early winter is just the best and there really is no lovelier time of year. Click through to check is all out. Continue reading…

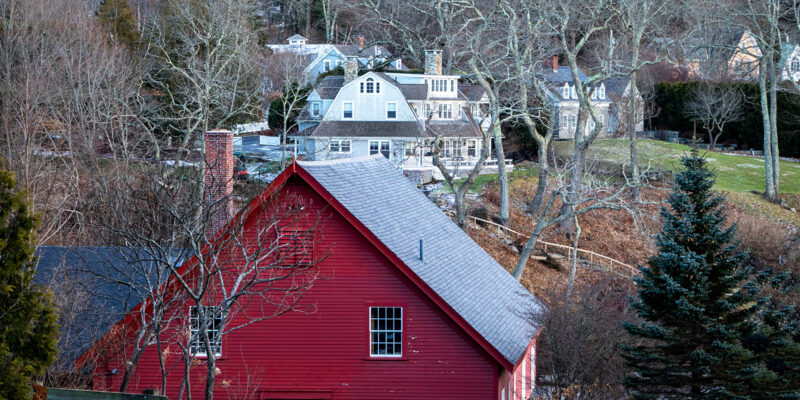
Visiting Camden at Christmas
A long time ago, someone called Camden “The Jewel of the Coast” and that name stuck. I’ve seen it everywhere. I suppose it stuck for a reason – Camden is absolutely stunning. Especially in December when all of their Christmas lights are on full display. We enjoy visiting the Maine coast during the winter months so much more than during the summer. There are far fewer people, the air is crisp, and everything is lit up. Out of all the towns in Maine we’ve visited so far, Camden has established itself as a favorite. The people of Camden just seem to know how to do things right. The entire Main Street is so inviting, the small shops are full of interesting gifts and people, and a simple walk is as enjoyable as they come. You’d think the Maine coast during the winter months would be windy, full of snow, and unbearable. While that surely can be the case, it can also be the most delightful place in the world. I actually can’t think of anyplace better. In this post, I first share a few facts about Camden and then I show off the photos I took during our most recent visit. You really need to click through to see them. Continue reading…